Saturday, June 23, 2007

brake work

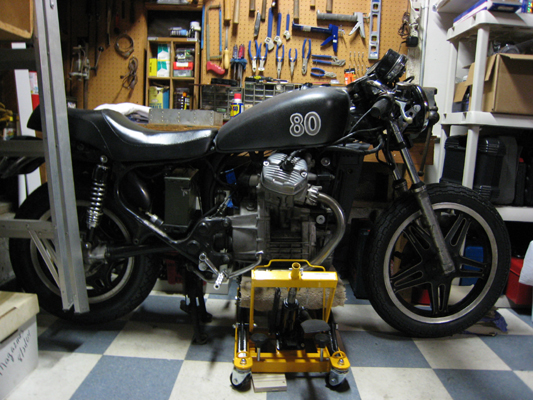
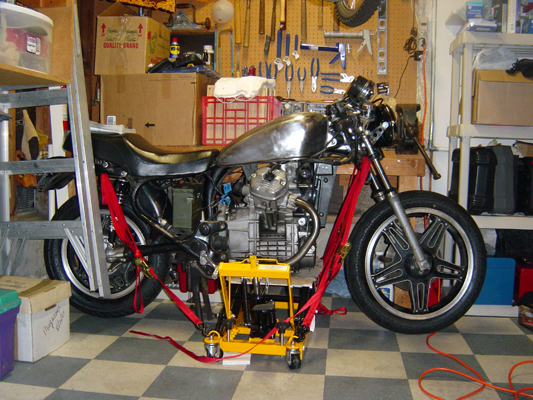
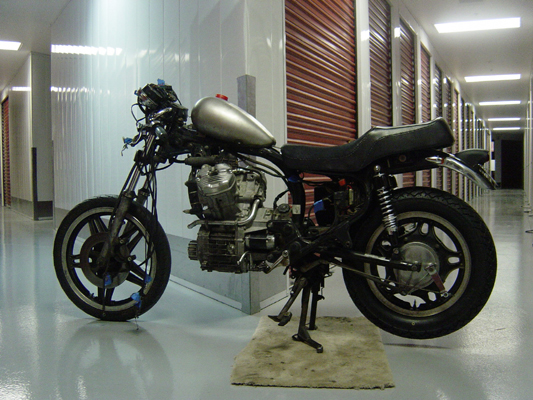
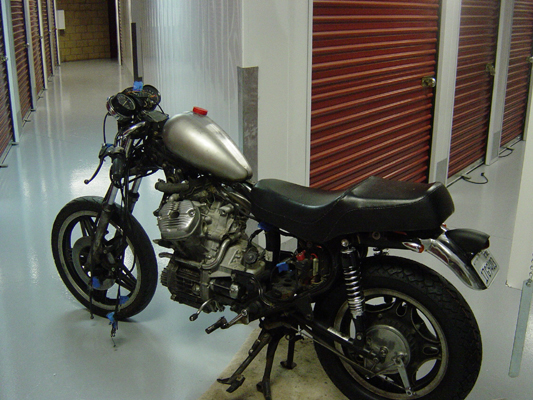
Hey everyone. So here is the scoop. About a month ago I got the air filters in the mail, and took my battery in to get filled and charged. So I hooked up the battery and put on the air filters, hooked up the gas line with new fuel filter, filled the tank and turned the petcock. Next thing I know I have gas pouring out of my carb. It looked like the gas was coming from the seals. Here are a couple of pics of the bike with the carb and air filters.


So for the last month I have been trying to find a carb rebuild kit with no avail. However, I did find this amazing website (http://www.honda-motorsports.com They basically have every part of every sytem that is on almost any honda ever made. The closest I came to getting a rebuild kit was getting a gasket kit (so it is in the mail). In the mean time I bought I caliper rebuild kit and went to work.

So for about thirty bucks you get a small bag with a couple rubber parts. Well there is not really much to the caliper to begin with. First thing first, I had to get the piston out of the caliper and it was not budging. The rebuild article I was reading said to shoot a liitle air in the caliper and it should shoot right out. So I took it over to my friend Damen's house, and with one shot of air the piston was out like trout.

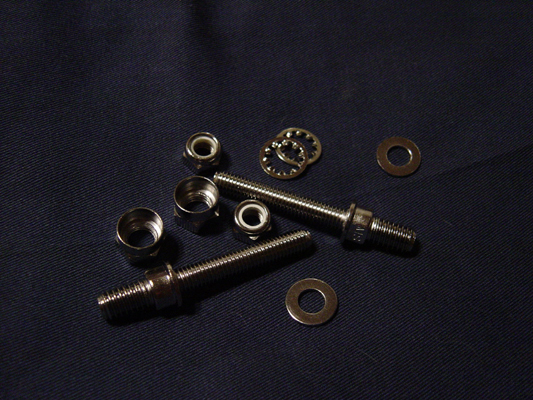
Back at the homestead came the fun part, cleaning. So the trick is to get into all the nooks and crannies and and to make sure you don't leave any dirt behind. The killer of all brakes is dirt. So I cleaned the heck out of it (tip: use denatured alcohol) and let it dry. Here are the parts.


Next I put in the new o-ring. So fresh and so clean. Then I rubbed the piston down with grease and slid it into the caliper. This did not go in smoothly. Once it saw the mallet in my hand it played nice.


Next was the dust boot. Fits like a glove.


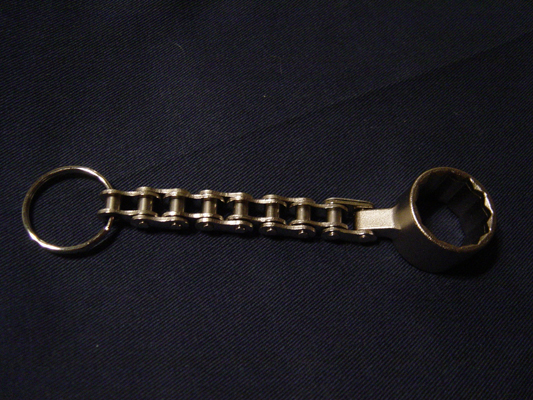
Here is the finished producto.


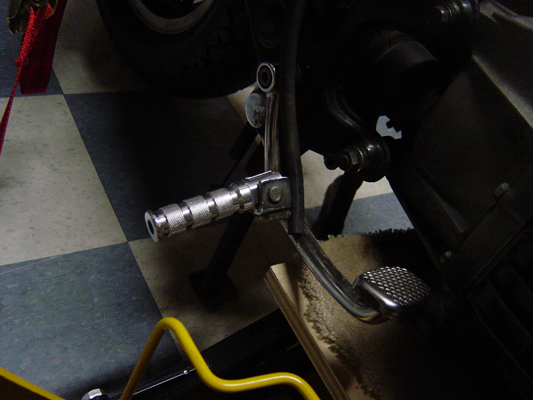
The next step is to put it on the bike with the pads and bleed the brakes. The problem is that one of the mounting screws broke off into one of the holes. Luckily the bolt broke off into a pin that is removable. So along with my gasket order I ordered a new pin and bolt for the caliper. Here is a picture of the broken bolt because I know you like pictures.


So I have a gasket kit in the mail with my brake pin and bolt. Next week should be fun.

Tuesday, May 08, 2007

More work

Alright this weekend was great, I got to work on the bike Friday Saturday and Sunday. Saturday morning I stopped by pepboys and picked up the fluids I need to fill the bike back up with as well as new crankcase breather hoses. After spending half the day at a hot rod show I got to work on the bike- what could be better. Even better, when I got home I had two boxes of parts I order waiting for me, Halleluia. I Cut and ran the new breather hoses, filled up the radiator with fluid, and put on my new rear view mirror. Just enough fun before we had to leave for the night. Sunday after church I installed the new spak plugs, filled up the engine with fresh oil, cut and ran a new fuel line with an in-line fuel filter. In my arsenal of goodies I got a new battery but it was shipped dry so it needs to be filled and charged. I also measured and ordered the air filter's for the newly rebuilt carb. So once the battery is charged and the everything is connected I will fill her with some gas and try to fire her up.

I still need to fill and bleed the front brake. However, I think I am going to take in the caliper to be checked out because it was completely stuck when I took it apart and that could be bad on the road. The anticipation is building, hopefully it will not be long before I am out on the open road with bugs in my teeth. Stay tuned.

Friday, May 04, 2007

CARBs

Hey everyone,

Today is a grand and glorious day. The carbs are back. All I have to say is Nick you are the man. These are the cleanest things I have seen, the transformation is amazing. Thanks Nick for all your hard work. I was so excited that I rushed home and put them on the bike. Here are the pics. I have a new battery and fuel line coming in the mail. This things should be up and running in no time. I hope.


Saturday, March 24, 2007

Work. Finally

As always it has been some time since I last worked on the bike or posted. Everyday I get into my car and see the bike just sitting there waiting to be ridden and in my whirlwind of business I just look at it and say "some day". Well hopefully that day will be soon. I have been waiting for my carb and thought that was the last thing I had to do, but I realized I still had some minor things that I had to finalize. I still hadn't put the front brake back on because I didn't have the pads. So, about a week ago I ordered them and they came in. It wasn't too hard putting them back in. After that was done I finally put on the stainless steel brake line. I had to run it a couple of time before I found the right fit (like honda cars there is not much room to work around). Here they are.


Then I put on the passenger foot pegs. Actually just the right one because for some reason I only had one bolt. Oh well, one down.


Last but not least I cut up some more of the battery box to make room for the connections (sorry no pictures). Well, I will leave with a fresh pic of the bike as of now. Thanks for everyone's support and questions, they keep me on track. Till I get the carb...
-B

Sunday, February 11, 2007

the Tank

The tank is finally finished, and for a homemade paint job I have to say it looks pretty good. So here is what I did. First I placed vinyl stickers on either side of the tank. I chose the number 80 because of the year of the bike. When they get peeled off in the end the numbers will be the actual metal of the tank. Then I prime the tank. Ahh, flat black.


Next, I sprayed it with a couple of coats of semi gloss black. Nice.


Then came the metalflake. It's coming along.


Then I pulled off the vinyl and outlined the numbers with white. The outlined didn't come out like I wanted to because the lines width were not consistent, thicker in some areas and more opaque in others. The end result was more of a rat rod look, which I am totally fine with.

Then I sprayed on the clear coat. Not too bad using spray paint.


Thursday, January 18, 2007

Tank Tank

So my most recent project is the gas tank. I have been trying to strip the old tank and get it ready for some new paint. The first step in the process was paint stripper. It works ok but it's a slow process. You spray it on, let it sit and then scrape it off. Sometimes it wants to come off easy and sometimes it doesn't want to leave it's home. This process was ok but it was a lot of work.


After doing this for a while I had a genius idea- use the grinder. So I threw the wire wheel on the grinder and went to work. The paint came off faster than it was put on. After about twenty minutes all the paint was gone.


After some fine grinding the tank looked shinier than a new quarter.


Next up is paint. I have a little more prep work but the next pictures you should see would be the tank with some color on it. Thanks for staying tuned.

Pictures. Finally

Alright. I'm back online. Here are the pictures.


Sunday, January 07, 2007

No Internet is bad news for blogging

Hey Everyone it's been awhile since I have posted. My last post was done last week been I wasn't able to upload the photo's so I held off on publishing the post. Well, here is the news. Since we have moved we have had a problem with our internet access. I am writing this from our laptop that has wireless internet access. The good thing about this new place is that we have a strong wireless signal coming from somewhere.

On to the build. I have actually got to do a bunch of work on the bike. About a week ago I had an epiphany, I figured I was going to use an old army ammo box for the battery box. So I went out to the army surplus store and picked on up. The box fits the battery side ways. I had this idea because I needed a battery box but I want to have a box to hold whatever on the bike. I had to make some cuts with my grinder to get the wires to the terminals that you will eventually be able to see. The height of the box fit perfectly under the seat where the battery was before, the only problem with that is that to open and close the box you would have to take it out because the lid is inches from the frame when closed. I might have to cut the top off the box and just have a battery tray. I am playing around with a couple ideas. Either way I got a cool battery box for about $9.

Next I have been working on the gas tank. For the record I am working on my old tank. The reason for this is that to make the new tank work I would have to get a whole new seat and rear fender. So for right now I am going to use the old tank and eventually use the new tank.

First things first, I had to take off the decals. To do this I had to use my heat gun to heat up the metal and scrape the decal off. Heat is key. If you try to this without it you are out of luck. If you heat up the decal you can basically scrape up one corner then peel it off- if you're good.

Next I stripped the paint so I can repaint it. So I got some paint stripper from the store and went to work. This has been a slow process. Basically you spray the stripper on the tank wait and scrape it off. Some parts of the tank were pretty easy but some parts did not want to give up the paint. So after a couple of days I busted out the grinder. With the wire brush wheel on it the paint came off in no time.

In a couple of days I plan on primering the tank and hopefully painting it by the following weekend. After that there is no much left. I am still not sure if it is going to run or not so I might have to take it in to see. Well keep up your heads and hopefully you will see some pictures soon.

Tuesday, December 26, 2006

Finally. I'm back

Hey everyone I haven't written for a while now because of the business of moving and all the running around with the Christmas season but I am back and in a real garage. That's right, no more storage unit, I actually get to work on my bike out of a garage, and it's a total blessing.

A couple of weeks back my bike was sitting on the jack with the front tire off. I talked to the guys at mission and they said that they might be able to grind down the front rotor to get rid of the rust and burrs. Normally you are not suppose to do that but they said they might be able to swing something. So I took it in to get my new front tire on and for they to hopefully help with my rotor. Unfortunately they could not grind down the rotor. I had looked before for a new rotor that would match my year and make but no such luck, so I thought to ask they and see what they came up with. Same thing- nothing. One of the tech's told me that the CB 400 has interchangeable parts with my bike, so they looked for a rotor for the CB 400. New it would cost me $400. No thanks. So I went home cruised around on eBay and found a 79' CX 500 rotor in good shape and bought it for $40. Gotta love eBay. Here are some pics of my new tire and rotor.

After putting the wheel back on I decided to put the headlight back on. I had tried to reassemble the headlight with my new bullet turn signals and the extension kit but the tunnel in the extension kit bolts were too narrow for the wires. I tried to bore out eh tunnels but I didn't have the right equipment and I was getting antsy. So I went to Home Depot got a couple of nuts and bolts and put it together without the turn signals. I mean who uses turn signals in California anyway. Well, at least I have them in the back.

After I put my fresh new front tire and rotor back on the bike I was able to move to it's new home (Tyler you're the man). With all the craziness of Christmas last night was the first time I got to touch my bike in a couple of weeks. For Christmas I got some new foot pegs- look at those beauty's. This was a quick and easy install.

Next I reattached the upper engine mounts. Then the coils and all the associated wires.

Next I reattached the front intake tubes that are connected to the cylinder heads. Now I am ready for my carb.

Though I was only able to do a couple of things, I was stoked I was able to get my hands dirty. I still have stuff to fabricate and paint, but for the most part I just have parts to put back on the bike. Stay posted....

Tuesday, November 28, 2006

Rear End

So I have been trying to work on the bike as I find time so only small thing are happening, but at least things are happening. Everytime I move the bike it's a killer on my rear, moving a bike with no seat is not much fun, let me tell you. So I brought my original seat to put on the bike so I can move it around in comfort. Tonight I put on the back fender and bullet turn signal lights. The wires are a little short so I have to buy more wire and extend them. Here is what it looks like.


With the rear in place and the seat on the bike, I figured "why not throw on the tank and see what she looks like". Well, the seat was too big to begin with but with the smaller tank it looks even bigger. Also, the seat is so big that I have to use my tip toes to move the bike, I liked being closer to the ground. The seat also adds a lot of weight to the bike as well. Looks like I am going to have to deal with it till I figure some thing out.


I am currently wiring and putting the headlight section back together, as well as putting the brakeline together. When I get my carb back from Saia engineering I will start putting everything else back on the bike. My biggest challenge is going to be relocating the coils, which hopefully is not that much of a big deal. I also have to paint the tank and side covers. Everything is coming together slowly. Thanks for everyone's support and help so far, it keeps me stoked on this project. Thanks everyone.

Friday, November 24, 2006

PARTS Galore

Today I got the package I was waiting for, parts. Essential parts that will let me move forward a little bit faster. Here is what I got. First things first here is my new helmet, black metalflake. This was a great eBay buy. It is used so it has some scratches on it but you have to look very close to see them and the liner is not the best but it was a great deal. Check it out.


Here are the goodies I was telling you about. This is a bullet light extension kit from Kuryakyn. This was kind of a shot in the dark. I needed these to attach my bullet style turn signals to the headlight. The bolt runs between both and the headlight bracket that is attached to the forks. So these bolts hold everything together. The bolts that came with the lights were too short and I was having a hard time finding ones at all. After a lot of searching I came across these, they were good deal and they fit. Halelula.


Next up is a stainless steel brake line and fittings by Goodyear. Need I say more.


Last but not least is my Sparkplug wrench keychain. Many people have problems with spark plugs when they ride and have to change them out on the road. In my set of tools I had a 5/8" spark plug socket but it was too small so I needed to get a bigger size. So I killed two birds with one stone. Pick one up at J&P cycles.


Well, that's all I have for today. Stay posted for more goodness.

Wednesday, November 15, 2006

A little more work

Hey everyone, I haven't got to work on the bike much lately but that will hopefully be changing soon. This last weekend I bought a motorcycle jack to lift the bike so I could take off the front tire to change the tire and rotor. Because my storage unit is so tight there was no way I would be able to get the jack in there to lift the bike. I will hopefully be working about of a real garage soon so I busied myself with some other little projects. A couple of weeks back I drained the brake fluid so I could disconnect the brake line to rerun it. So first things first- disconnect the brake line. There was still some fluid left in the caliper so I was careful. Here is the disconnected line.


Next I wanted to take a look at the brake pads. Like I said before the description in the Clymers was different that the actual brake caliper. To take out the pads I had to take off the caliper. Like I suspected, the pad was completely worn away and the brake was running metal to metal- not good. Here is my naked wheel.


Then I switched it up and reinstalled the starter motor and the shift lever.


Remember the mess of wires I was talking about on the front of the bike. Well the brake cable was wrapped around electrical wires that were wrapped around the throttle cables and clutch cable. First thing I had to do was take the brake off completely. This made my life a lot easier. With the brake line out of the way I reran most of the wires so they were clear of each other and didn't catch on anything. Here are a couple of shots of the in-progress mess. I didn't take a picture of the finished result but trust me it's a lot better.


I made the decision that I am going to get a new brake line instead of cutting the old one. I measured for the ideal length of the new line. For a new stainless steel brake line and new banjo fittings I would be spending less than $60. This will be a cleaner set up and will look cool on the bike. I also have a list of many other parts but I am going to hold off until I get the new tire on and move the bike. Check back soon because I just got my jacket and my vintage metalflake helmet is in the mail. I will keep you guys posted with all the happenings.

Wednesday, November 08, 2006

Cafe bobber?

So here are some images of the new tank placed on the bike. The more I look at it the better I like it. I knew the new tank would be shorter than the original tank before I bought it and you can definitely see it in these pictures. The tank is shorter and narrower- just what I wanted- but it's a little taller. Looks like I am going to have to place the tank a little lower down the frame looking at these pictures. No matter where I put the tank I am going to have to fabricate it. The back mounting tab will have to be extended and bent down following the curve of the frame. The front will either have extended mounting brackets from either side of the front of the tank to the mounting holes on the frame or I can just drill straight through the frame where the front of the tank is, I am not sure. The tank is also sitting a little high due to the coil mounts so it is not fully sitting on the frame. The easier said than done solution- cut them off and relocate the coils. Whatever I do to make it work will be worth putting that cool tank on the bike. Remember, when I started this blog I said I wanted to make a cool chopper cafe bike. With this tank, my proposed exhaust and my refurbished back fender I have the bobber chopper style down. With the frame, suspension, handle bars and front end I will have my cafe elements. I think this will truly be a one of a kind bike when I am done. Can you say cafe bobber?