More parts. More work.
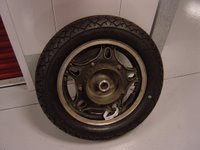
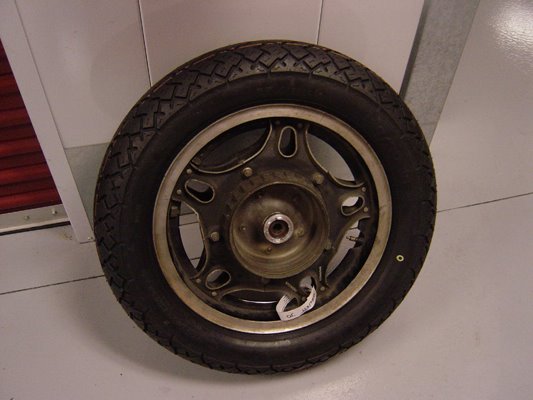
So last week I took the rear tire and rim along with my new tire to Mission Motorsports to get mounted and balanced. A couple hours later this is what she looked like.
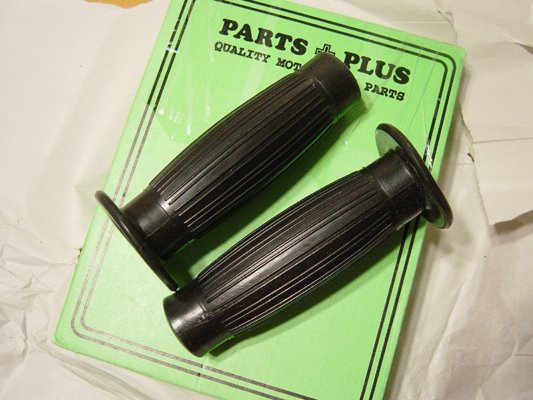
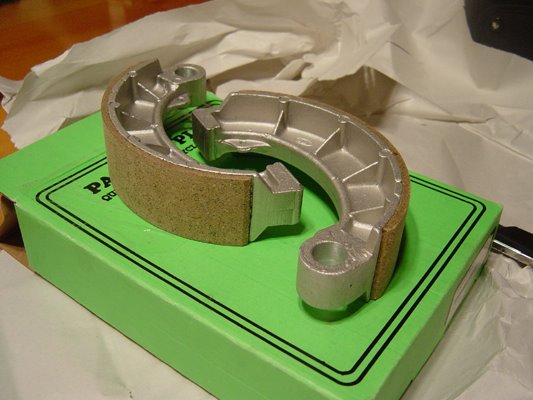
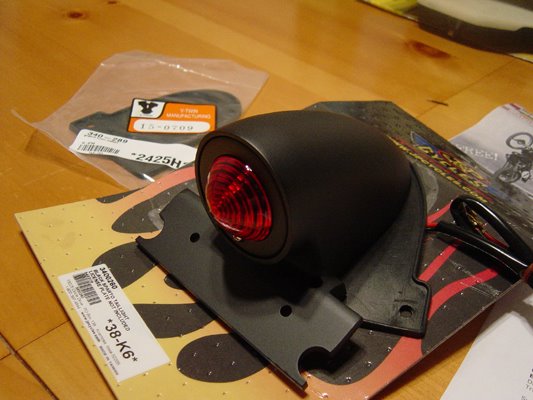
Like I said last time, the brakes looked kind of dirty so I was going to replace them. Not only did I order new brake pads but I also ordered new grips and my new tail-light. The grips and pads came from "old biker barn" and the sparto tail-light came from J&P cycles. Feast your eyes on these goodies.


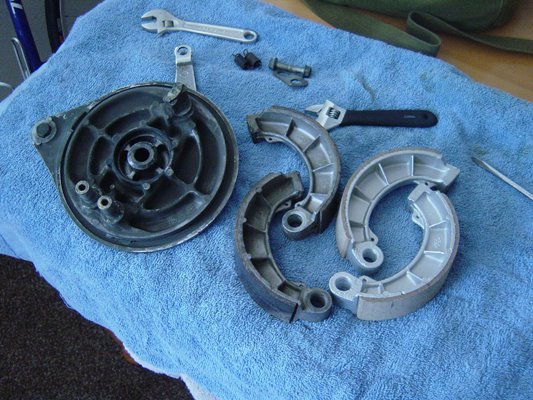
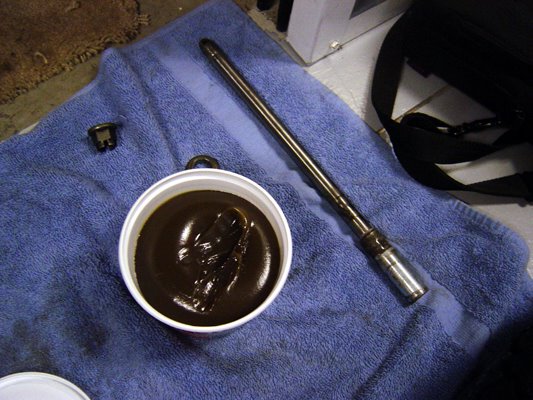
So here I go. The first thing I had to do was replace the old brake pads with the new ones. It wasn't that hard to get the old ones off, though I did it a different way than clymer's recommends. You know it wouldn't be my bike if something wasn't difficult. What I had problems with was the brake arm. It didn't want to come loose. Then went I loosen it it didn't want to come off, so I had to work around it. Then when I was done it didn't want to go back on. Here is the brake taken apart. Look how dirty the housing it. Brake dust- Mmmmmmmmmm.

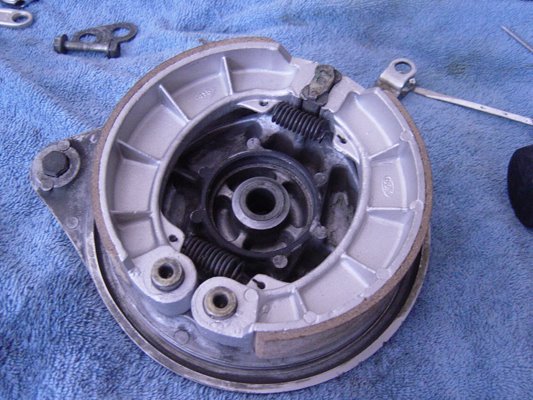
After cleaning it as much as I could without throwing it in the shower I managed to get the new brake pads on. Now doesn't that look nice.

Next it was time to head on out to my storage unit to install the new tire and brakes on the bike. My first task was to get the tire in place. The tire was wider than space I had because of the final drive. Taking off the final drive would have been a real chore so with some squeezing , pushing and pulling I was able to get it in. Then I had to align the wheel hub splines to engage the final drive. Next it was time to install the axle rod. Remember, it is always good using lubrication when going into tight places.

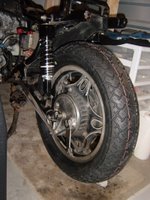
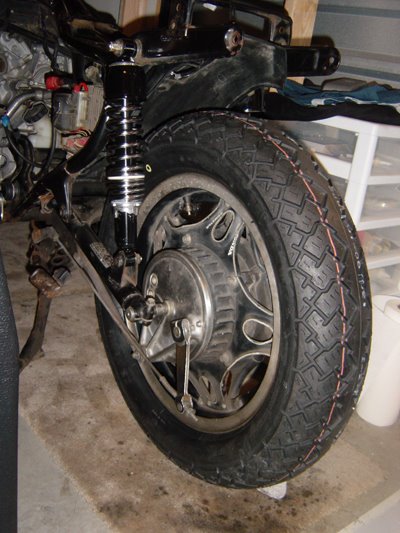
After the axle rod was installed I had to reconnect the brake torque arm and the brake rod. I had to play around with putting the brake arm in different positions to properly connect to the brake rod to get a good stopping/brake response. I had to work with three factors the brake rod, the brake arm and the brake rod adjustment screw. After a couple of minutes I think I got it right. My excitement quickly turned to frustration when I realized I forgot my torque wrench. Some of the bolts require specific torque measurements so I will have to go back and do that later. Well, here is a picture of everything installed. Next I will be working on the rear fender and tail-light. Stay tuned.
Like I said last time, the brakes looked kind of dirty so I was going to replace them. Not only did I order new brake pads but I also ordered new grips and my new tail-light. The grips and pads came from "old biker barn" and the sparto tail-light came from J&P cycles. Feast your eyes on these goodies.
So here I go. The first thing I had to do was replace the old brake pads with the new ones. It wasn't that hard to get the old ones off, though I did it a different way than clymer's recommends. You know it wouldn't be my bike if something wasn't difficult. What I had problems with was the brake arm. It didn't want to come loose. Then went I loosen it it didn't want to come off, so I had to work around it. Then when I was done it didn't want to go back on. Here is the brake taken apart. Look how dirty the housing it. Brake dust- Mmmmmmmmmm.
After cleaning it as much as I could without throwing it in the shower I managed to get the new brake pads on. Now doesn't that look nice.
Next it was time to head on out to my storage unit to install the new tire and brakes on the bike. My first task was to get the tire in place. The tire was wider than space I had because of the final drive. Taking off the final drive would have been a real chore so with some squeezing , pushing and pulling I was able to get it in. Then I had to align the wheel hub splines to engage the final drive. Next it was time to install the axle rod. Remember, it is always good using lubrication when going into tight places.
After the axle rod was installed I had to reconnect the brake torque arm and the brake rod. I had to play around with putting the brake arm in different positions to properly connect to the brake rod to get a good stopping/brake response. I had to work with three factors the brake rod, the brake arm and the brake rod adjustment screw. After a couple of minutes I think I got it right. My excitement quickly turned to frustration when I realized I forgot my torque wrench. Some of the bolts require specific torque measurements so I will have to go back and do that later. Well, here is a picture of everything installed. Next I will be working on the rear fender and tail-light. Stay tuned.
posted by B-rent at 4:04 PM
![]()

0 Comments:
Post a Comment
<< Home